Tesla home charger installation Electric vehicle ownership comes with many advantages and a great driving experience. Still, the most important benefit is the ability to have your home charging station. Once you have decided to purchase a Tesla vehicle, here comes the next most important step: installing your Tesla home charger.
Learn More | EV Charger Rebate In BC
Installing your Tesla home charger in North Vancouver is one of the most important parts of owning an electric vehicle. For some people, installing a home charger for their Tesla may seem intimidating. Don’t worry though, we are here to help with all your electrical needs.
A Beginner’s Guide to Setting Up Your Tesla Home Charger
The advantages of owning an electric car:
- Reduce greenhouse gas emissions
- Eliminate tailpipe emissions Save money on fuel by charging at home instead of at the pump (depending on local gas prices) Create a quiet and comfortable driving experience
- Electric cars produce little or no noise Electric cars provide a smooth ride with instant torque and no shifting Low maintenance compared to traditional vehicles Fewer moving parts and oil changes
The Basics of Home Charging
Home charging is the process of plugging your Tesla into a home electrical outlet and then connecting it to an EVSE (Electric Vehicle Service Equipment) unit that is mounted on a wall. There are two types of home charging units: Level 1 and Level 2.
Level 1 is the most common type of home charging unit. It typically charges your Tesla from a standard home outlet at a rate of about 3 to 5 miles per hour (4 to 6 miles per hour).
Level 2 is the most advanced type of EVSE unit. It charges your Tesla at a rate of around 15 to 30 miles per hour (7 to 9 miles per hour) by connecting it to an electric 240-volt circuit. If you want to get the most out of your Tesla’s capabilities, we highly recommend you install a Level 2.
Why Do You Need to Install a Tesla Home Charger?
There are a few reasons why you might want to consider installing a Tesla home charger.
- Home charging stations are more convenient than public charging stations. You don’t have to spend hours waiting at a public charging station to charge your car. Instead, you can charge your Tesla overnight and wake up refreshed.
- Public charging stations are more expensive than home charging stations. You can save money over time by installing a home charging station.
- Tesla recommends home charging stations to ensure your vehicle and home are safe.
- Home charging stations charge your Tesla faster than using a regular power outlet.
What Do You Need To Know Before The Installation Process Of Tesla Wall Connector?
Upgrade Your Electrical Panel
Your Tesla vehicle charger needs a good power supply, so it is important to upgrade your electrical panel. Most modern homes have 200-amp electric panels, so you don’t have to worry about upgrading your electric panel. However, some electric panels are still 100-amp and can’t keep up with modern power demands. If you think your electric panel isn’t keeping up with the power demand and can’t power your Tesla vehicle charger, it’s time to upgrade it.
Decide The Location For Charger
Choosing Where to Install the Charger Your Tesla charger will be placed at the location where you intend to park your car so that it can remain in the same location and charge up to run for a full day. When choosing where to install the charger, keep in mind that it will require power from your home’s electrical panel, so it’s best to choose a spot near the electrical panel and away from rainwater.
Requirements and Considerations for Tesla Home Charger Installation
Electrical Capacity and Panel Upgrades
Before you start daydreaming about your sleek new Tesla charger, it’s important to consider your electrical capacity. Depending on your home’s electrical system, you may need to upgrade your panel to support the charger’s power requirements. Don’t worry, though, a qualified electrician can help you navigate this process smoothly.
Tesla Home Charger Model Selection
Like choosing between a latte or an espresso, selecting the right Tesla home charger model is all about personal preference. Tesla offers a range of chargers tailored to different needs, so you can find one that suits your lifestyle and budget. Take some time to do your research and find the perfect match for you and your Tesla.
Obtaining Necessary Permits and Inspections
Ah, the joy of paperwork and bureaucracy. Installing a Tesla home charger may require permits or inspections in your area. But don’t worry, it’s all part of the process. Just make sure to check with your local authorities and follow any requirements.
Choosing the Right Tesla Home Charging Station
When it comes to choosing the right Tesla home charging station, there are two main types of Tesla home charging stations: Tesla Wall Connector and Tesla Mobile Connector.
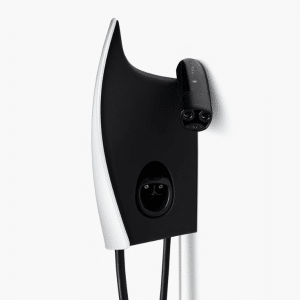
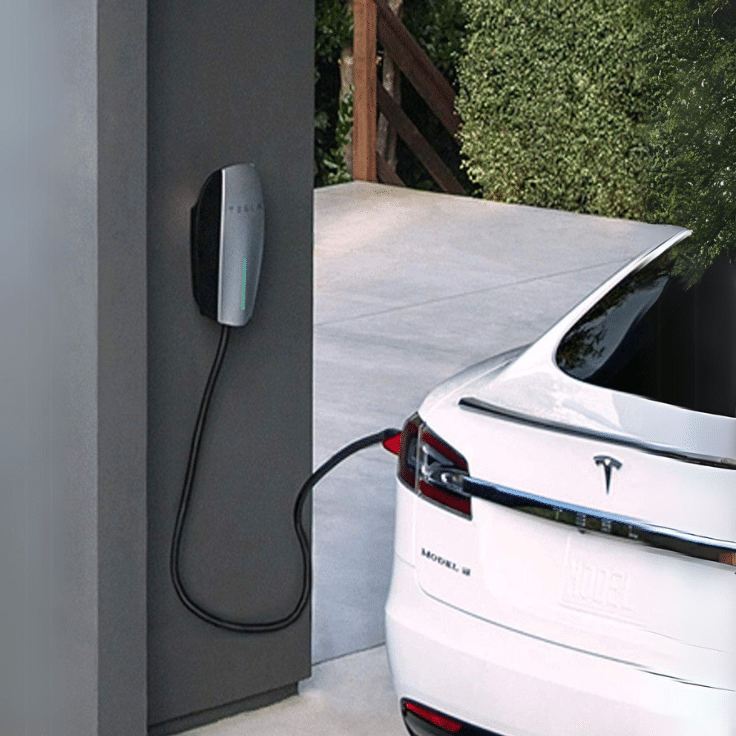
Tesla Wall Connector is hardwired charging stations that offer the fastest charging speeds for your vehicle. They can be used indoors or outdoors and require a licensed electrician to install.
The Tesla mobile connector is a charging station that is included with your Tesla vehicle. It plugs into a standard wall socket. The charging speed of the mobile connector is slower than that of the wall connector. The mobile connector is a great backup charger or if you are planning to travel and need an on-the-go charging option.
Choosing the Right Location for Your Tesla Home Charger
Evaluating Electrical Accessibility
When it comes to finding the perfect spot for your Tesla home charger, you want to make sure it’s easily accessible to your electrical system. You’ll want to consider factors such as distance from your electrical panel and the availability of a dedicated circuit.
Determining the Ideal Mounting Position
Well, you’ll want to find a location that is convenient for you to plug in your Tesla but also protects the charger from the elements. A garage wall or a sturdy post in your driveway are popular options.

Steps Involved in the Tesla Home Charger Installation Process
Preparing for Installation
There are a few things you need to do to prepare for the installation. First, make sure you have a dedicated circuit breaker for your charger. Trust me, you don’t want your charger competing with your blender for power. Second, check that your electrical panel can handle the extra load. You don’t want to blow a fuse every time you want to charge your car. Finally, find a suitable location for your charger that’s easily accessible.
Electrical Wiring and Connection
Now that you’re prepared, it’s time to get down to the nitty-gritty of electrical wiring. Unless you’re an electrician or have a strange obsession with volts and amps, it’s best to leave this part to the professionals. They’ll ensure everything is wired correctly, so you don’t end up frying your car or house.
Mounting and Securing the Charger
Once the electrical work is done, it’s time to mount and secure your shiny new charger. Find a sturdy spot on your wall and attach the charger using the provided screws. Just make sure it’s at a comfortable height, so you don’t have to bend down like you’re picking up a penny every time you want to plug in.
Tesla Home Chargers Installation Method
There are three ways to install your Tesla home charging station:
- professional installation
- DIY installation
- semi-DIY installation
Professional Installation The electrician will assess your home’s electrical system, install all the electrical components you need, and program your charging station’s wall or mobile connector. This is the most recommended way to install a charging station because it’s safe and meets local regulations. If you choose to install a DIY charging station, it’s best to hire a licensed electrician and follow the installation process as described in the Tesla installation guide. This method is cheaper than professional installation and meets local building codes as well as safety standards.
How does TashLight install Tesla Home chargers?
An overview of the process TashLight Electric has created a hassle-free installation process for Tesla home chargers to make your life as easy as possible. The installation process varies depending on your location and age of your house, but the steps are the same for us. We begin by providing you with an honest and fair quote for our installation process. You can contact us directly through our website.
The next step is for our team member to ask you for all the information regarding your project. To help you, we always recommend having an electric panel with an amp rating of 200-amp for the best possible experience. Once we receive all your information, we quickly review everything regarding your electric panel requirements and circuit breaker for a stress-free installation process.
Once we’re done with each estimate, our certified electrician will come to your home at your scheduled time and check out your entire home and system. We will also walk you through the entire process so you can feel confident that we know exactly what we’re doing and the electrician knows what they’re doing too. Because we’re certified electricians ourselves, we always provide you with the correct quote for the process.


